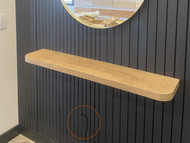
Cutting Around Outlets and Switches: Slat Wall Installation Made Easy
Posted by Josh Lorg on Aug 5th 2025
So, you’ve unboxed your sleek new J Thomas Home slat wall panels, admired their natural wood grain, and are ready to elevate your space with that modern, architectural vibe. Everything’s going smoothly… until you hit your first obstacle: a light switch. Or maybe it’s a power outlet. Either way, now’s not the time to panic. Cutting around outlets and switches during slat wall installation isn’t just possible, it’s easier than you think.
This guide walks you through the process step-by-step, so you can install your panels with confidence and get back to admiring your handiwork, no sparks, no splinters, no stress.
Before You Begin: Prep Like a Pro
First off, congratulations on your purchase! Each box of J Thomas Home slat wall panels includes two pre-finished panels, designed to install easily and beautifully right out of the box. But before you reach for the drill, take a moment to gather a few additional tools:
- Sharp saw (for cutting across slats)
- Craft knife (for cutting the felt backing)
- Construction adhesive (optional, for added hold)
- 1.4-inch drywall screws (black for black panels)
- Measuring tape, pencil, and level
- Safety gear (goggles, gloves—you know the drill)
Step 1: Map Your Obstacles
Before gluing or screwing anything to the wall, lay out your panels and identify any electrical features, outlets, switches, thermostats, or wall-mounted controls. Hold a panel against the wall and mark exactly where the outlet or switch falls in relation to the panel's slats and felt backing.
Pro tip: Use painter’s tape or a pencil to lightly outline the cut area on the panel. Measure twice, cut once.
Step 2: Cut with Precision
Once you’ve mapped the area, it’s time to make your cuts. For this, you’ll need:
- A sharp saw (a jigsaw or fine-tooth handsaw works well)
- A craft knife for trimming the felt backing
Start by cutting the slats where needed to create an opening for the electrical feature. Be sure to keep your cuts clean and tight, you want the faceplate of the outlet or switch to overlap the panel’s edges for a seamless finish.
After cutting the slats, flip the panel over and use your craft knife to carefully cut through the felt backing. This allows the panel to lie flush against the wall and around the outlet box.
Step 3: Check the Fit
Dry-fit the panel against the wall before gluing or screwing it in place. This is your chance to make any fine adjustments. The opening should line up perfectly with your outlet or switch, allowing enough space for the faceplate to sit flush without forcing or bending.
Remember: it doesn’t have to be absolutely perfect behind the scenes. As long as the faceplate covers the cut, you’re golden.
Step 4: Glue and Secure
If you're using construction adhesive, now's the time to apply it. Cut the tip of the glue, insert it into your dispenser, and apply even strips to the felt backing, keeping about a 2-inch gap from the edges to avoid glue squeeze-out.
Carefully press the panel into place. Then, secure it with drywall screws driven directly through the felt backing. Don't worry about the screws showing, your next panel will interlock with the previous one and hide the fasteners completely.
Step 5: Reattach the Faceplate
Once your panel is securely in place and the adhesive has set (if used), reattach the outlet or switch cover plate. This final touch hides your careful cutting work and gives everything a clean, finished look.
If the panel is slightly thicker than your previous wall surface, you may need to use outlet extenders or spacers so the outlet sits flush with the new wall face. These are inexpensive, easy to install, and available at any hardware store.
Don’t Forget the End Pieces!
Once all your slat wall panels are installed and you’ve neatly trimmed around outlets, it’s time to complete the look with matching end pieces. These finishing touches give your project a clean, professional edge—taking it from a simple DIY to a designer-quality feature wall.
Pro tip: Consider using a black outlet cover. It blends seamlessly and creates a sleek, cohesive look. A white cover, in contrast, can disrupt the visual flow.
Need end pieces? Head over to jthomashome.com to order yours today. Just cut to fit and attach with finishing nails or adhesive—simple, stylish, and smart.
Admire Your Work—You’ve Earned It
Cutting around outlets and switches might seem intimidating at first, but with the right tools and a little planning, it becomes just another step in the transformation process. You’ve turned a flat wall into a statement piece, congrats!
Now, grab your phone and snap a photo of your finished slat wall masterpiece. Tag us on Instagram or send it our way, you might just see your space featured on our social media or website!
Need help?
We’re here to make your install smooth from start to finish. Call or email anytime, and we’ll guide you through it.
913-353-4283
customerservice@jthomashome.com
www.jthomashome.com

